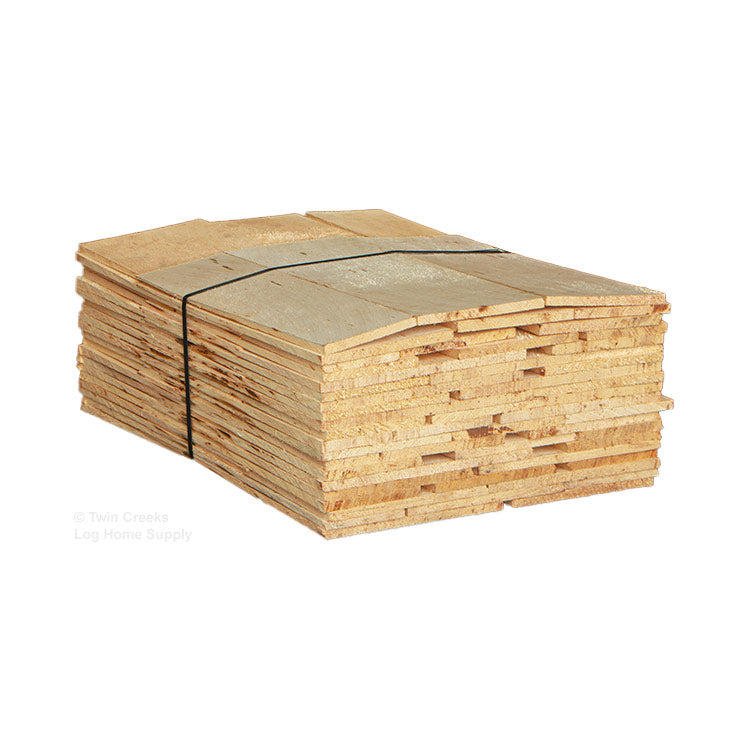
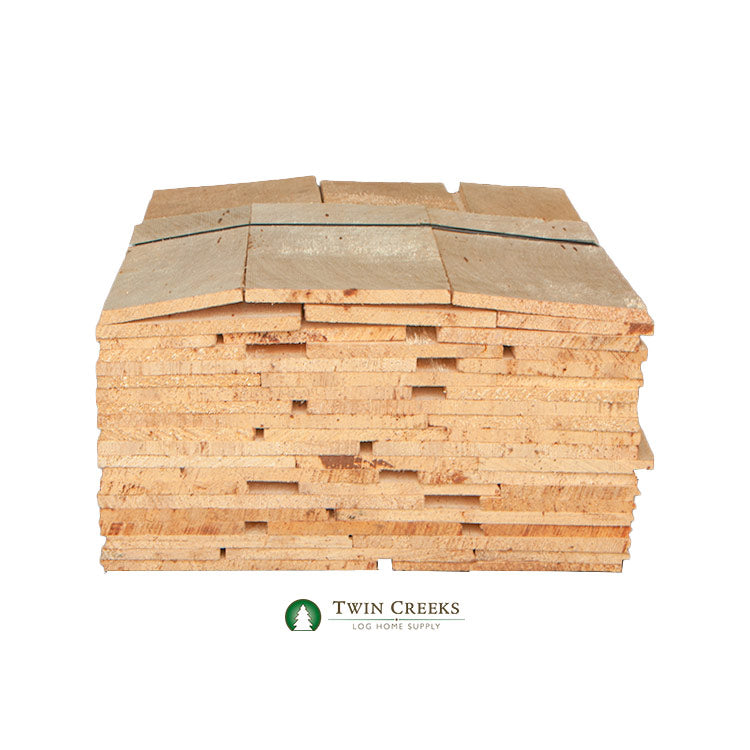
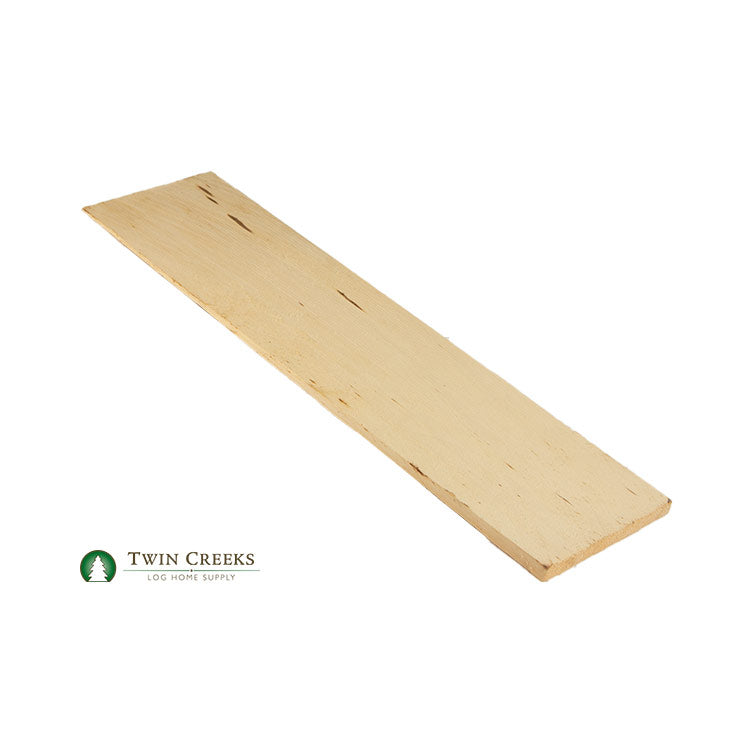
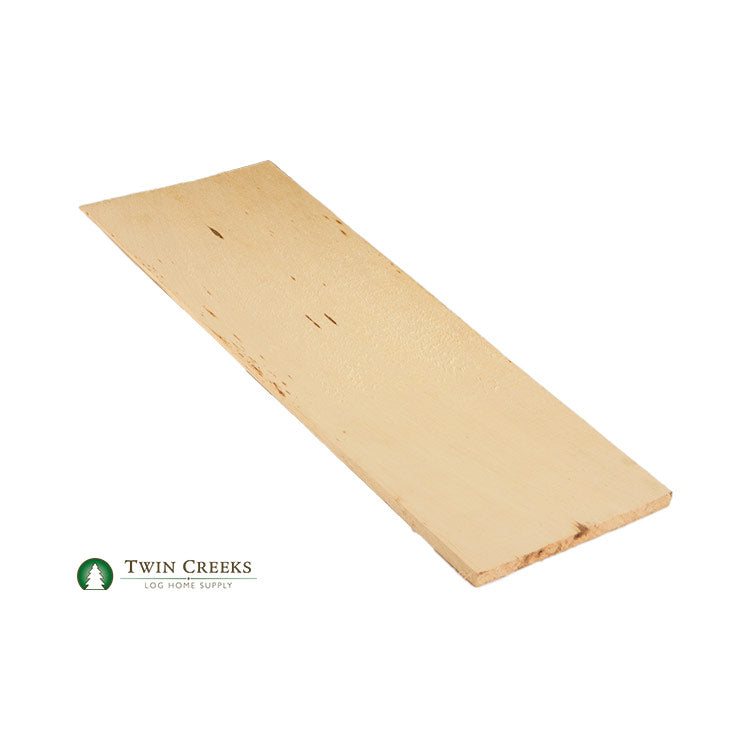
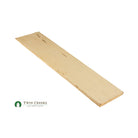
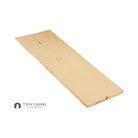
Bundle #1 Grade 18" Alaskan Yellow Cedar Shingles

Bundle #1 Grade 18” Alaskan Yellow Cedar Shingles Is popular due to its unique properties and appearance. Graded to the same exacting quality control products written by the Cedar Shake and Shingle Bureau for Western Red Cedar. These products weather to a lighter, more silvery gray than Western Red Cedar.

Please call for a custom shipping quote if you need 10 or more bundles.
SKU:
$155.95

Typically ships in 1 business day

Bundle #1 Grade 18” Alaskan Yellow Cedar Shingles Is popular due to its unique properties and appearance. Graded to the same exacting quality control products written by the Cedar Shake and Shingle Bureau for Western Red Cedar. These products weather to a lighter, more silvery gray than Western Red Cedar.

Features & Benefits of Yellow Cedar Shingles:
Extreme Durability – Cedar Shingles easily withstand harsh weather conditions including heavy wind, rain, and hail.
Longevity – Alaskan Yellow Cedar is known as one of the most durable softwoods. With proper maintenance Cedar Shingles can beautify your home for decades. Lasting longer than other other wood types.
Energy Efficiency – Cedar offers excellent insulation for your home, keeping it warmer during cold months, while allowing your home to breathe and stay cooler during the warmer months.
Termite Resistance – Alaskan Yellow Cedar wood is naturally resistant to termites.
• Ease of Installation – Great for Do-It-Yourself projects, Cedar Shingles are easy to install.
Versatility – Alaskan Yellow Cedar Shingles can be used with many different architectural styles, affording you the option of a home covered in beautiful Cedar wood, or simply a small rustic accent area on an otherwise traditional home.
Quality Milling – We sell only the highest quality Cedar products.
Adaptability – Cedar Shingles are manufactured to be used on both interior and exterior wall surfaces.

Product Specifications:
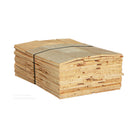
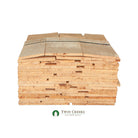
Packaging: Roofing-style bundle secured with a plastic strap. These bundles are packed 18/18. That is, 18 rows of shingles by 18 rows of shingles with the tapered tops interleaving in the middle of the pack and the butt ends facing out.
Shingle Length: 18" (Perfection)
Grade: Number 1 Grade.  For exterior or interior walls where a superior quality product is desired. Clear heartwood: 100% edge grain; no defects.
Texture: Natural Sawn
Thickness: 5/2-1/4" (5 shingle “butts” stacked together should measure 2 ¼” thick)
Width: Shingles can vary from 4”-8” wide.
Exposure Options: These shingles can be installed with exposures from 4” to 14”.
Typical Bundle Dimensions: 24"x18"x8"
Shipping Options: These bundles can be shipped via UPS or FedEx within a cardboard box or can be palletized if shipped by a trucking method.

Coverage Rate Information:
Coverage Rates Chart
• Each bundle is sized to cover 25 square feet of wall if applied at a 5-1/2" shingle exposure. The chart above provides a conversion for coverage at different exposures.
• When using double coursing, this product has a maximum recommended exposure of 14".
• When using single coursing, this product has a maximum recommended exposure of 8".

Single Coursing Vs. Double Coursing Application Methods:
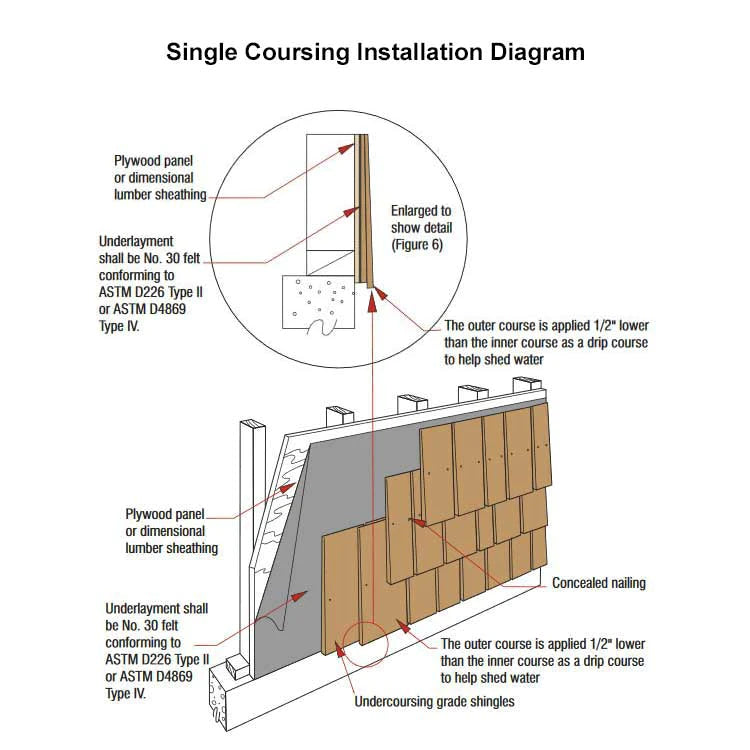
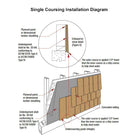
• Using the single coursing application method, the shingles are installed with one layer of shingles per run.
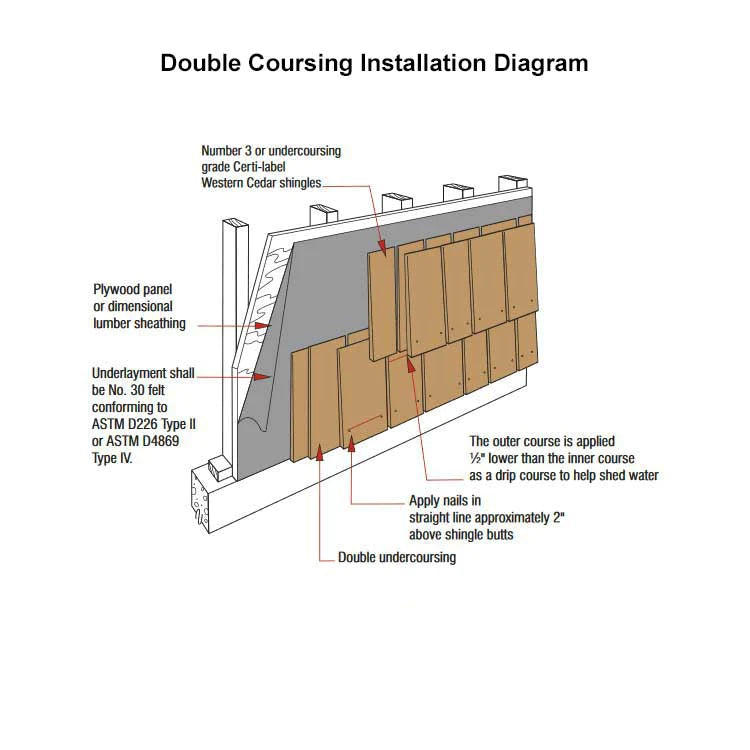
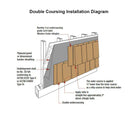
• Using the double coursing method, two shingles are installed on top of each other on every layer. This method allows more of the face of each shingle to be exposed, providing more square footage of coverage from each bundle of shingles. Double exposure application also saves money on material and produces a more noticeable shadow line.

Estimating Cedar Shingles:
1. Start by measuring the amount of square footage you have to cover.
2. Each bundle will vary in the amount of completed coverage it will yield based on the width of exposure you choose. Exposure is the height in inches of the shingle face not covered by the next shingle course. Generally, the wider the exposure, the more coverage you will get from the bundle.
3. Using the chart above, identify the amount of coverage per bundle at your desired exposure.
4. Divide the square footage of coverage needed by the square footage per bundle value that you just selected from the chart.

Example: 500 square feet of wall needs to be covered using #1 Grade 18" (Perfection) Cedar Sidewall Shingles. The highest level of exposure is desired; therefore, the shingles can be installed as a double course with a 14" exposure. At 14" exposure, each bundle of shingles should yield 64 square feet of coverage. So, divide the 500 square feet of wall coverage by the 64 square feet of coverage per bundle (500 / 64 = 7.8 bundles). Since the calculation indicates that a partial bundle is required, round up to 8 bundles to ensure that enough shingles will be available to complete the job.

Product Resources:
Alaskan Yellow Cedar Product Selection Guide
Cedar Shake and Shingle Specification Guide
CSSB Exterior and Interior Wall Manual
CSSB New Roof Construction Manual

Additional Resources for 18” Alaskan Yellow Cedar Shingles:
Guide to Certi-Grade 18" Perfection Shingles Grading Rules
USDA Guide to Installation, Care, and Maintenance of Wood Shingle Siding
Alaskan Yellow Cedar Species Guide
Basics Guide for Cedar Shakes and Shingles

Application Notes:
• Good workmanship is crucial to the integrity of any sidewall system. Installers should read the CSSB Wall Manual carefully to ensure that they follow proper workmanship practices.
• Yellow Cedar shingles and shakes are applied on walls in a different manner than on roofs. The major point of difference is in permissible weather exposures; on walls the maximum weather exposure is greater than it is on roofs.
• A given area of wall will require less material than the same area of roof.

Single Coursing Alaskan Yellow Cedar Shingle Installation:
1. Apply 15-30 lb. felt building paper over sheathing.
2. Double the first course at the base of the wall. Use dry low grade #3 or #4 shingles or other acceptable undercoursing for the starter course.
3. Space shingles slightly apart (1/8"-1/4") to allow for expansion and prevent possible buckling.
4. Offset joints 1 1/2" from adjacent corners.
5. Drive nails approximately 1 inch above butt line of succeeding course of concealed nailing.
6. For shingles up to 8" wide, two nails in each shingle are placed 3/4" from each edge. For wider shingles, a third nail should be driven into the center.
7. Use only 1 1/4"-1 1/2" hot dipped zinc or aluminum nails only.

Double Coursing Alaskan Yellow Cedar Shingle Installation:
1. Follow the same direction with the following exceptions.
2. Two layers of dry undercoursing recommended for the starter course, then the outer course
3. Each succeeding course requires dry undercoursing to be applied before the outer course is applied. Outer courses should be applied 1 inch lower than the undercoursing.
4. Face Nail the outer course shingles with two casing-type nails (as in #7 above), driven about 2 inches above the butt line, 3/4" from each edge plus additional nails every 4 inches for wider shingles (as in #6 above).

Finishing Alaskan Yellow Cedar Shingles at Corners
1. Outside corners can be finished by lacing, butting against corner boards or mitered.
2. Inside corners are finished by butting shingles against a square wood strip on the inside corner.
**Note: Install the best face facing outward.**

Finishing Cedar Shingles:
•  Use oil-based stains only. To hasten the weathering process, apply a bleaching oil finish.
• Generally finish products immediately after installation providing that the moisture content is appropriate for both the finish product being used and your locale. If the finish is not applied promptly, adhesion can be compromised (unless additional surface preparation is undertaken).
• If you have installed a natural product (unfinished), apply your finish before rain and other moisture are absorbed.  Ensure that you account for high humidity concerns.
• In all instances drying time varies from region to region. Excessive moisture will limit finish adhesion.
• If you clean the surface prior to finishing, ensure that it is allowed to dry to the finish manufacturer's recommended moisture content level before applying a new finish.

Nails:
• Each Yellow Cedar shingle should be applied with two fasteners.
• Nails must be stainless steel Type 316 in locations within fifteen (15) miles of salt water.
• For locations outside the salt water zone - nails must be stainless steel Type 304, Type 316, or hot-dipped zinc coated galvanized conforming to a coating weight of ASTM A 153 Class D (1.0 oz/ft2).
• Stainless steel nails, although more expensive, offer the highest degree of corrosion resistance.
• Minimum nail lengths are shown in the fastener chart located in the CSSB Wall Manual.
• In double course applications, the exposed Yellow Cedar shingle should be face-nailed with two nails (as above), driven 2" above the butt line, and 3/4" from each edge.
• Yellow Cedar shingles wider than 10" require 2 additional nails. Drive these two nails approximately 1" apart near the center of the shingle.
**Please Note: some nail manufacturers offer nails specifically for wood shake or shingle sidewall application.

Staples:
• If you choose to use staples they must be stainless steel Type 316 in locations within fifteen (15) miles of salt water.
• For locations outside of the salt water zone, stainless steel staples Type 304 or Type 316 must be used.
• Two staples should be driven per shingle with the staple crowns 7/16" minimum horizontal, maximum 3/4" horizontal, to the shingle butt.
• Staples are driven in the same location as nails relative to the sides and overlapping butt line.
• Shingles wider than 10" require 2 additional staples driven approximately 1" apart near the center of the shingle.
• Fasteners should be long enough to penetrate into the sheathing at least 3/4" or all the way through, and driven flush with the surface of the shingle.
• In all applications, staples should be concealed by the course above.
• DO NOT USE ELECTRO-GALVANIZED (EG) FASTENERS.
• Nails are preferred for aesthetic reasons in sidewall applications using exposed fasteners.

Product Questions

Have a Question?

Be the first to ask a question about this.

Ask a Question
DETAILS

Bundle #1 Grade 18” Alaskan Yellow Cedar Shingles Is popular due to its unique properties and appearance. Graded to the same exacting quality control products written by the Cedar Shake and Shingle Bureau for Western Red Cedar. These products weather to a lighter, more silvery gray than Western Red Cedar.

Features & Benefits of Yellow Cedar Shingles:
Extreme Durability – Cedar Shingles easily withstand harsh weather conditions including heavy wind, rain, and hail.
Longevity – Alaskan Yellow Cedar is known as one of the most durable softwoods. With proper maintenance Cedar Shingles can beautify your home for decades. Lasting longer than other other wood types.
Energy Efficiency – Cedar offers excellent insulation for your home, keeping it warmer during cold months, while allowing your home to breathe and stay cooler during the warmer months.
Termite Resistance – Alaskan Yellow Cedar wood is naturally resistant to termites.
• Ease of Installation – Great for Do-It-Yourself projects, Cedar Shingles are easy to install.
Versatility – Alaskan Yellow Cedar Shingles can be used with many different architectural styles, affording you the option of a home covered in beautiful Cedar wood, or simply a small rustic accent area on an otherwise traditional home.
Quality Milling – We sell only the highest quality Cedar products.
Adaptability – Cedar Shingles are manufactured to be used on both interior and exterior wall surfaces.

Product Specifications:
Packaging: Roofing-style bundle secured with a plastic strap. These bundles are packed 18/18. That is, 18 rows of shingles by 18 rows of shingles with the tapered tops interleaving in the middle of the pack and the butt ends facing out.
Shingle Length: 18" (Perfection)
Grade: Number 1 Grade.  For exterior or interior walls where a superior quality product is desired. Clear heartwood: 100% edge grain; no defects.
Texture: Natural Sawn
Thickness: 5/2-1/4" (5 shingle “butts” stacked together should measure 2 ¼” thick)
Width: Shingles can vary from 4”-8” wide.
Exposure Options: These shingles can be installed with exposures from 4” to 14”.
Typical Bundle Dimensions: 24"x18"x8"
Shipping Options: These bundles can be shipped via UPS or FedEx within a cardboard box or can be palletized if shipped by a trucking method.

Coverage Rate Information:
Coverage Rates Chart
• Each bundle is sized to cover 25 square feet of wall if applied at a 5-1/2" shingle exposure. The chart above provides a conversion for coverage at different exposures.
• When using double coursing, this product has a maximum recommended exposure of 14".
• When using single coursing, this product has a maximum recommended exposure of 8".

Single Coursing Vs. Double Coursing Application Methods:
• Using the single coursing application method, the shingles are installed with one layer of shingles per run.
• Using the double coursing method, two shingles are installed on top of each other on every layer. This method allows more of the face of each shingle to be exposed, providing more square footage of coverage from each bundle of shingles. Double exposure application also saves money on material and produces a more noticeable shadow line.

Estimating Cedar Shingles:
1. Start by measuring the amount of square footage you have to cover.
2. Each bundle will vary in the amount of completed coverage it will yield based on the width of exposure you choose. Exposure is the height in inches of the shingle face not covered by the next shingle course. Generally, the wider the exposure, the more coverage you will get from the bundle.
3. Using the chart above, identify the amount of coverage per bundle at your desired exposure.
4. Divide the square footage of coverage needed by the square footage per bundle value that you just selected from the chart.

Example: 500 square feet of wall needs to be covered using #1 Grade 18" (Perfection) Cedar Sidewall Shingles. The highest level of exposure is desired; therefore, the shingles can be installed as a double course with a 14" exposure. At 14" exposure, each bundle of shingles should yield 64 square feet of coverage. So, divide the 500 square feet of wall coverage by the 64 square feet of coverage per bundle (500 / 64 = 7.8 bundles). Since the calculation indicates that a partial bundle is required, round up to 8 bundles to ensure that enough shingles will be available to complete the job.

Product Resources:
Alaskan Yellow Cedar Product Selection Guide
Cedar Shake and Shingle Specification Guide
CSSB Exterior and Interior Wall Manual
CSSB New Roof Construction Manual

MORE INFORMATION

Additional Resources for 18” Alaskan Yellow Cedar Shingles:
Guide to Certi-Grade 18" Perfection Shingles Grading Rules
USDA Guide to Installation, Care, and Maintenance of Wood Shingle Siding
Alaskan Yellow Cedar Species Guide
Basics Guide for Cedar Shakes and Shingles

Application Notes:
• Good workmanship is crucial to the integrity of any sidewall system. Installers should read the CSSB Wall Manual carefully to ensure that they follow proper workmanship practices.
• Yellow Cedar shingles and shakes are applied on walls in a different manner than on roofs. The major point of difference is in permissible weather exposures; on walls the maximum weather exposure is greater than it is on roofs.
• A given area of wall will require less material than the same area of roof.

Single Coursing Alaskan Yellow Cedar Shingle Installation:
1. Apply 15-30 lb. felt building paper over sheathing.
2. Double the first course at the base of the wall. Use dry low grade #3 or #4 shingles or other acceptable undercoursing for the starter course.
3. Space shingles slightly apart (1/8"-1/4") to allow for expansion and prevent possible buckling.
4. Offset joints 1 1/2" from adjacent corners.
5. Drive nails approximately 1 inch above butt line of succeeding course of concealed nailing.
6. For shingles up to 8" wide, two nails in each shingle are placed 3/4" from each edge. For wider shingles, a third nail should be driven into the center.
7. Use only 1 1/4"-1 1/2" hot dipped zinc or aluminum nails only.

Double Coursing Alaskan Yellow Cedar Shingle Installation:
1. Follow the same direction with the following exceptions.
2. Two layers of dry undercoursing recommended for the starter course, then the outer course
3. Each succeeding course requires dry undercoursing to be applied before the outer course is applied. Outer courses should be applied 1 inch lower than the undercoursing.
4. Face Nail the outer course shingles with two casing-type nails (as in #7 above), driven about 2 inches above the butt line, 3/4" from each edge plus additional nails every 4 inches for wider shingles (as in #6 above).

Finishing Alaskan Yellow Cedar Shingles at Corners
1. Outside corners can be finished by lacing, butting against corner boards or mitered.
2. Inside corners are finished by butting shingles against a square wood strip on the inside corner.
**Note: Install the best face facing outward.**

Finishing Cedar Shingles:
•  Use oil-based stains only. To hasten the weathering process, apply a bleaching oil finish.
• Generally finish products immediately after installation providing that the moisture content is appropriate for both the finish product being used and your locale. If the finish is not applied promptly, adhesion can be compromised (unless additional surface preparation is undertaken).
• If you have installed a natural product (unfinished), apply your finish before rain and other moisture are absorbed.  Ensure that you account for high humidity concerns.
• In all instances drying time varies from region to region. Excessive moisture will limit finish adhesion.
• If you clean the surface prior to finishing, ensure that it is allowed to dry to the finish manufacturer's recommended moisture content level before applying a new finish.

Nails:
• Each Yellow Cedar shingle should be applied with two fasteners.
• Nails must be stainless steel Type 316 in locations within fifteen (15) miles of salt water.
• For locations outside the salt water zone - nails must be stainless steel Type 304, Type 316, or hot-dipped zinc coated galvanized conforming to a coating weight of ASTM A 153 Class D (1.0 oz/ft2).
• Stainless steel nails, although more expensive, offer the highest degree of corrosion resistance.
• Minimum nail lengths are shown in the fastener chart located in the CSSB Wall Manual.
• In double course applications, the exposed Yellow Cedar shingle should be face-nailed with two nails (as above), driven 2" above the butt line, and 3/4" from each edge.
• Yellow Cedar shingles wider than 10" require 2 additional nails. Drive these two nails approximately 1" apart near the center of the shingle.
**Please Note: some nail manufacturers offer nails specifically for wood shake or shingle sidewall application.

Staples:
• If you choose to use staples they must be stainless steel Type 316 in locations within fifteen (15) miles of salt water.
• For locations outside of the salt water zone, stainless steel staples Type 304 or Type 316 must be used.
• Two staples should be driven per shingle with the staple crowns 7/16" minimum horizontal, maximum 3/4" horizontal, to the shingle butt.
• Staples are driven in the same location as nails relative to the sides and overlapping butt line.
• Shingles wider than 10" require 2 additional staples driven approximately 1" apart near the center of the shingle.
• Fasteners should be long enough to penetrate into the sheathing at least 3/4" or all the way through, and driven flush with the surface of the shingle.
• In all applications, staples should be concealed by the course above.
• DO NOT USE ELECTRO-GALVANIZED (EG) FASTENERS.
• Nails are preferred for aesthetic reasons in sidewall applications using exposed fasteners.

REVIEWS
PRODUCT QUESTIONS

Product Questions

Have a Question?

Be the first to ask a question about this.

Ask a Question