Perma-Chink Chinking

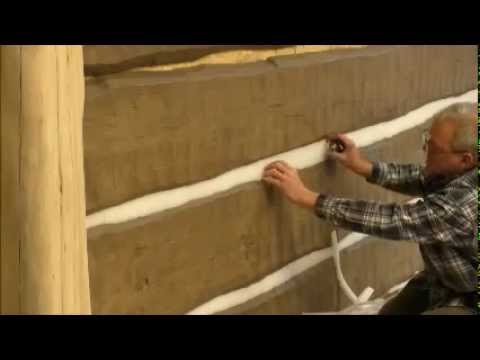
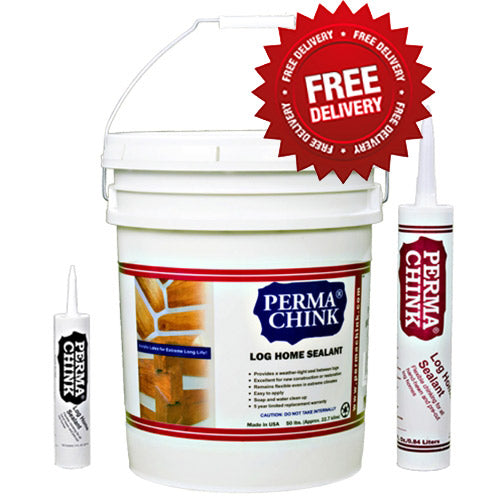
Perma-Chink Chinking is a flexible, textured chinking that seals the open gaps between logs to eliminate heat loss and air infiltration. While delivering the appearance of traditional mortar, Perma-Chink Chinking is formulated as a pure acrylic to deliver lasting durability and elasticity for your log home. FREE SHIPPING ON ALL SIZES TO CONTINENTAL USA.
SKU:
From $114.99

Size
Color

Free Ground Shipping
We are offering free shipping for all sizes of this product purchased online and shipping to the Lower 48 United States. Offer does not apply to Alaska, Hawaii, and the US Territories. Free Shipping applies to this item only and not the entire order.

Perma-Chink Chinking is a flexible, textured chinking that seals the open gaps between logs to eliminate heat loss and air infiltration. Even though it looks and feels like traditional mortar, it's not. Perma-Chink Chinking is a pure acrylic that adheres to logs and stretches to maintain a tight seal by following log movement.

Application can be done by the homeowner or a professional contractor.

Features & Benefits:
• Eliminates Air and Water Infiltration.
• Remains Flexible to Allow for Log Movement.
• For Exterior and Interior.
• Suitable for all Climates.

Coverage Rate Chart:

Coverage Rates Chart

• Coverage Chart refers to linear feet per 5 gallon pail of Perma-Chink.
• Perma-Chink should be applied 3/8" thick.
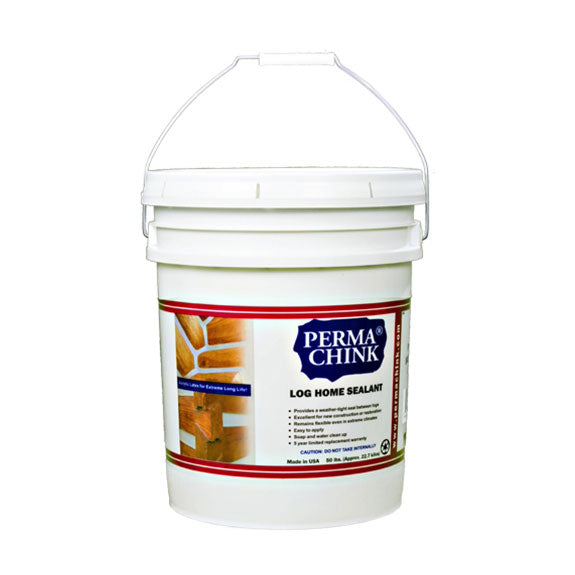
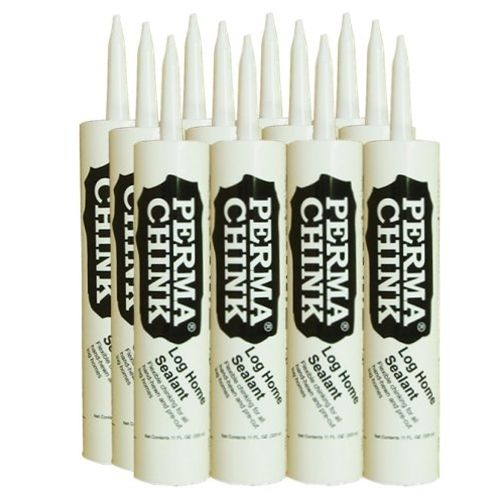
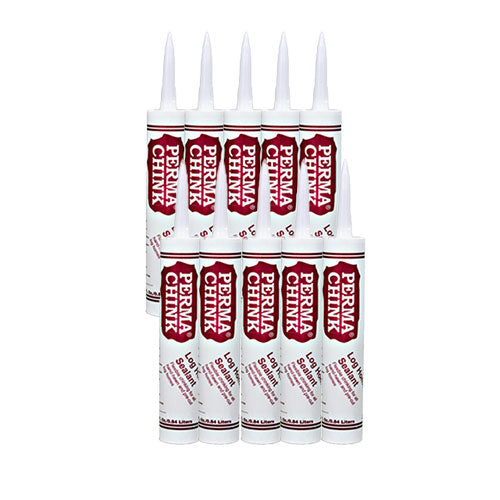
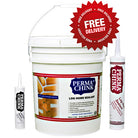
• 1 Pail = approximately (55) 11 oz. tubes.
• 1 Pail = approximately (20) 30 oz. tubes.

Color Chart:

Perma-Chink Color Chart

Where to Use Perma-Chink:
• Interior and Exterior.
• On chink-style log homes.
• To replace old, crumbling mortar on older and historic log homes.
• To create a chinked look on a wood sided surface.

Application Methods:
• Chink Pump.
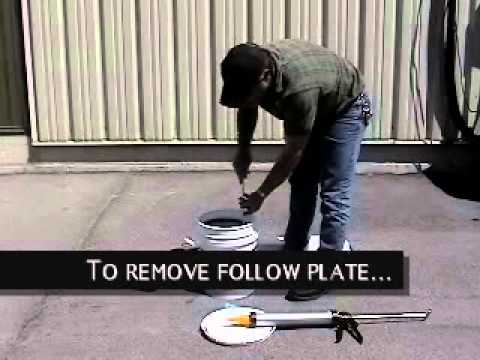
• Bulk-loading gun and follow plate.
• Ratchet caulking gun.
• Application bag.

How to Measure My Chinking Project:
• There are two dimensions that you need to know in order to determine how much product you will need: the width and the cumulative length (linear feet) of the gaps or joints that you want to seal.
• Figuring the Width: If it is a chink joint on a squared log it is the average distance between upper and lower log surfaces. If it is round log chink joint you first have to insert a length of proper size Grip Strip and then measure the distance between the top and bottom logs about 3/8 of an inch in front of the surface of the Grip Strip
• Figuring the Cumulative Length (Linear Feet): It is best if you break it down to one wall at a time then add all of the walls together it becomes much simpler. Start by measuring the length of the wall with a tape measure. Then count the number of joints you need to seal. Usually it is the number of log courses minus one. When you multiply these two numbers together you have the linear feet of sealant required for that wall.
• Keep in mind that the depth is an average depth across the joint. We tend to think of the depth in the middle of the joint where it is actually the thinnest. If your estimations are generally short, check to see that you use average joint depth.

Colors:
• Beige 216, Black 227, Brown 223, Cedar 230, Light Gray 212, Medium Gray 224, Sandstone 215, Stone 211, Tan 219, White 207

Recommended Chinking Application Tools:
• Application bags, caulking gun or bulk loading caulking gun.
• Follow plate for bulk loading gun. Click for the Tapered Follow Plate.
• Tool Pouch.
• Clean, lint-free rags for wiping down log surfaces, for spills, runs and cleanup.
• Trowels and spatulas (close to the width of the finished seam is best).
• Masking tape if desired.
• Sharp knives suitable for trimming backer-rod.
• Cardboard box or table for holding backer-rod while adhesive is applied.
• Spray adhesive (such as 3M™ 77) for installing backer-rod.
• Spray/mist bottle (use water with a few drops of soap as a release agent).
• Isopropyl alcohol – combine with 50% water for ‘release agent’ mixture.
• Masonry margin trowels of appropriate sizes (1/2” to 2” most commonly used).
• Sheets of heavy plastic or canvas to protect job site from spills and inclement weather.
Closed Backer-Rod in appropriate sizes, or other backing materials such as Grip Strip.
• Adequate quantity of chinking/caulking.

Preparation Instructions:
• Before starting, inspect the installation of backing materials. Where pieces of backer butt up to one another, make sure that there are no gaps or ledges between pieces.
• If you find gaps, fill them with backing material or cover the span with tape.
• Make sure that the wood surfaces along the seam are clean and free of oils or waxes to insure proper adhesion of the cured chinking.

Application Information:
• Freshly applied sealants should be protected from direct rainfall for a minimum of 24 hours. Either watch the weather or drape a newly sealed wall with plastic film. Be sure to allow some airspace between the wall and the plastic to facilitate drying.
• Avoid applying sealants in direct sunlight or when the temperature is less than 40° F. In cold weather it’s important that the logs be free of frost and dew in order to ensure that the sealant adheres tightly to the wood. Like stain, the best surface temperature range for easiest application and best results is between 50° F and 80° F.
• Apply only as much chinking as you are able to tool smooth in about 15 minutes (less in warm dry weather that causes the chinking to skin over rapidly).
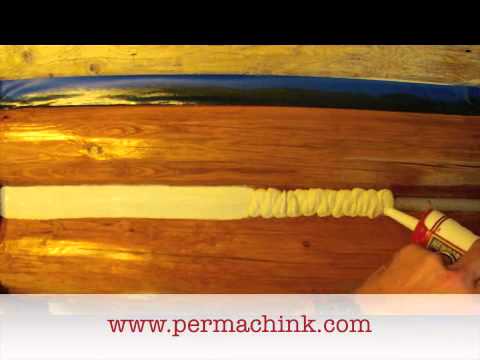
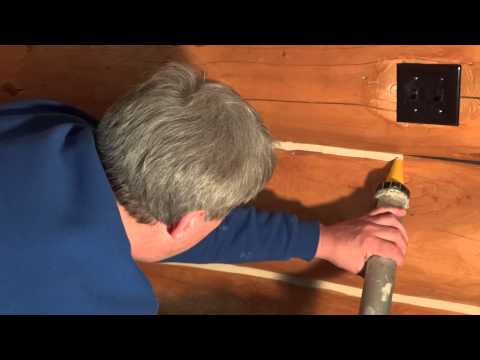
• Start by holding the applicator tip against the back surface of the joint and apply a bead of chinking. If multiple beads will be required to span the entire gap, apply them close together to avoid trapped air during tooling.
• Apply enough chinking to maintain a wet thickness of approximately 3/8 inch.
• The first step in finishing is to wet the trowel only (not the chinking), then spread it out evenly to 3/8 inch thickness, making sure the wet chinking is in good contact with the wood surfaces at both edges of the seam. Good contact is critical for proper adhesion after curing.
NOTE: Be careful to maintain proper thickness in all corners.
• After smoothing to the proper thickness, lightly wet the surface of the chinking and tool to finished smoothness.
• Avoid applying enough water to cause it to run onto the wood surface. Wipe any runs immediately.
• Tip: If you used masking tape at the edges of the chinking, remove it now and smooth out edges with your tool.
• If your preference is for the finished chinking to have a different texture than smooth, you should experiment before application.

When to Apply Perma-Chink:
• Weather: Protect freshly applied Perma-Chink Chinking from rain for at least 24 hours to allow a water resistant skin to form.
• Apply Perma-Chink log home sealant after staining for the best finished appearance and least total labor to avoid getting stain on the new chinking.
• Best: After application of Lifeline, but before Lifeline Advance clear topcoat (Lifeline Advance should be applied over Perma-Chink log home sealant, making it easier to clean.)
• Second Best: After application of Lifeline stain and Lifeline Advance topcoat.
• Worst: Over a fresh application of oil based stain. Oil based stains must be allowed to dry for 2 months. Then, clean the chinking surface with alcohol to remove dust and oily residues.

Can Perma-Chink be Applied In Hot Temperatures?
• Applications of all Perma-Chink exterior finish removers, cleaners, stains, topcoats and sealants can be a bit of a challenge in extremely hot weather, i.e. over 90° F.
• Sealants such as Perma-Chink are more sensitive to direct sunlight even in cooler temperatures than they are to heat in general. Direct sunlight accelerates the “skinning over” of the sealant trapping the water contained within the product. When this water converts to water vapor and tries to escape from the product it can create bubbles or blisters on the surface of the sealant.
• High ambient temperatures do influence the viscosity of sealants, they become more fluid, but for the most part they can still be successfully applied even when the temperature exceeds 90° F as long as the freshly applied product is protected from direct sunlight.

Why is Backing Material Needed?
• The use of backing material behind a sealant such as Perma-Chink serves two purposes; one, to assure the proper thickness of the sealant so that it can stretch and contract without breaking; and two, to provide a surface that the sealant will not bond to so that it can stretch without tearing away from the wood.
• The dynamics of sealing an exterior joint or crack in wood is the same regardless of the width of the gap or the product being used. If the wood is unseasoned at the time a sealant is applied, the wood will shrink with time and in order to compensate for the shrinkage the sealant must be applied in a manner that will allow it to stretch.
• When a sealant is applied too thick, once it cures it won't be able to stretch enough to compensate for the wood's shrinkage and may rip apart. When applied too thin it becomes too weak to stretch without breaking
• If applied too thick they cannot stretch without tearing and if too thin they will be weak and will tear when pulled apart. In the case of sealants manufactured by Perma-Chink Systems the magic number is an applied wet thickness of 3/8”. This results in a cured sealant with excellent elongation and maximum strength.
• Backing materials serve little purpose other than providing a suitable sealant thickness and surface for the proper application and performance of the sealant.
• Some important features of a good backing material include:
1. It must be inert and not outgas or react with the sealant.
2. The sealant itself should not bond tightly to it.
3. It should not wrinkle or deform when the sealant is applied over it.
4. It needs to be able to withstand temperatures of at least 190º F without warping or distorting.

What Types of Backing Material Should I Use When Applying Perma-Chink?
Grip Strip. Closed Cell Backer Rod. Polyisocyanurate board (Polyiso or R Max).
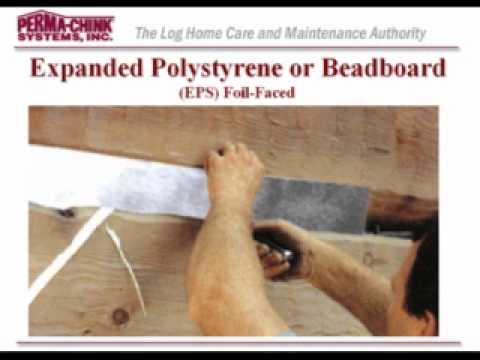
• Expanded polystyrene (EPS) beadboard, foil-faced. Chinking applied over the foil covered side.
• Polyurethane foam (Pur Fill, Great Stuff, Styrofoam).
• Water-resistant masking tape or pinstripe tape.
• DO NOT USE: Extruded Polystyrene (causes blisters), Blue Board, Pink Board or other colored board that outgasses to cause blisters. If you are unsure about your backing material, check with Perma-Chink Systems before using it.
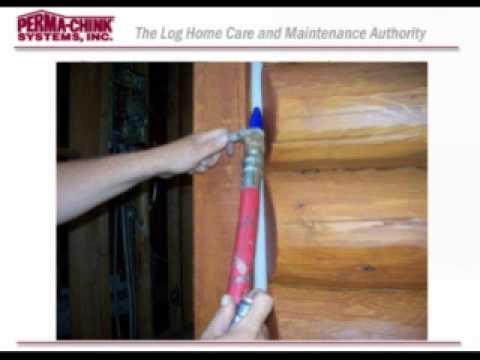
• There are a number of products specifically designed for use as backing materials for sealants. For smaller gaps, joints and cracks the most commonly used material is Closed Cell Round Backer Rod. It comes in a range of sizes and is relatively inexpensive.
• Since it is flexible it can be pushed into a crevice without needing to be nailed or stapled. Grip Strip is designed for sealing larger gaps. Similar in composition to backer rod it is shaped like a trapezoid so it can be squeezed in between round logs although it can be used for a variety of situations. Grip Strip provides a flat surface for chinking or sealing.
• For wide chink joints between squared logs it is typically recommend the use of polyisocyanurate board (polyiso or R Max) or expanded polystyrene (EPS) beadboard. However, one side of the beadboard should be covered with a foil to help reflect the heat.
• If plain beadboard is used, there is a risk of the beadboard deforming on sunny areas where wall temperatures can reach over 180 degrees. When using foil covered beadboard the chinking needs to be applied over the foil side.
• In joints that are too narrow to insert even the smallest diameter backer rod, a narrow strip of water-resistant masking tape works quite well. Do not use masking tape that wrinkles because if it gets wet wrinkles may show through the sealant.
• An excellent option is to use pinstripe tape available at most automotive supply stores. The tape is vinyl, so it is waterproof and most sealants will not adhere to it. Pinstripe tape is available in widths down to 1/8”.

Drying & Curing Information:
• Perma-Chink log home sealant develops a skin in a short period of time. Full curing requires it to dry all the way through and may take a number of weeks. Cool temperatures or high humidity extends drying time.
• Protect freshly applied sealants from rain for at least 24 hours to allow a protective skin to form.
• Blisters during curing are common to sealant applications in hot environments. Blisters can be caused by use of improper backing materials or by trapping air inside of the wet chinking during application. Prevent most blisters by making sure to trowel all air out of seams in “multi-bead” applications.
• Avoid application in direct sunlight on south and west walls. If newly applied chinking is exposed to sunlight begins to blister, the effect can be minimized by shading the walls with white tarps for the first 1-2 days. In the first few days, blisters can be closed by puncturing the surface skin of the chinking and carefully pressing the blister surface back against the wet chinking inside.
• Perma Chinks cures completely in 2-8 weeks depending on temperature and humidity.

Clean Up and Storage:
• Clean area and equipment immediately with warm, soapy water before the Perma-Chink dries.
• For removing Perma-Chink that has dried, soften with alcohol and then clean with warm water. Please do not pollute our environment.
• Store Perma-Chink chinking in a clean, dry place and out of direct sunlight.
• Do not allow the material to freeze. Although Perma-Chink is freeze-thaw stable, if the product is accidentally frozen, allow to thaw, mix well and check for suitability of use before applying.

Maintenance Information:
• Periodic cleaning with an appropriate cleaner such as Log Wash will clean off dust and dirt and accentuate the beauty of your home.
• Perma-Chink Systems recommends that log walls be washed down at least twice a year. Small rips and tears may be repaired using a bead of Perma-Chink and a damp short bristled brush to blend it in with the surrounding area. Tears greater than one foot long should be cut out and the chinking replaced.

How To Avoid and Correct Blistering:
• Blisters are a common phenomenon with chinking and caulking products and are caused by a variety of things. Blisters appear as “bubbles” in the chink line and can vary widely in size.
• Do not apply in direct sunlight.
• Protect fresh chinking from direct sunlight for 1-2 days after application with white plastic sheeting or traps tacked over it.
• If a blister begins to develop: Pop the blister and gently push the material back into place. 3 to 5 days later, apply a skim coat of Perma Chink and tool to blend in.

How to Repair Torn Perma-Chink:
• First, use a razor knife to slit the chink or caulk line a bit further to release pressure on the bead. Then, clean the surface by wiping it down.
• Gun new chinking or caulking over the torn area, then smooth (tool) the new product, feathering it out onto the existing bead.
• If no backer rod was applied, you may need to cut out the torn area, install backer rod, and then follow the remaining steps as noted above.

Perma-Chink How-To Guides For Perma-Chink Chinking:
Drying and Curing Times
Protecting Uncured Chinking
Why Use Backing Materials?
Loading Bulk Guns
Repairing Perma-Chink
Chink Paint Vs. Chinking

Product Questions

  • I'm planning to use chinking on my logs. What kind of stain should I use with it?

    These days, most chinking projects utilize water-based acrylic latex chinking products and the chinking is intended to contrast in color from the wall stain. If this is your case, we recommend using a water-based stain with a clear topcoat for your log walls. This is more for practical reasons than compatibility concerns. Even though most chinking products are water-based, compatibility will not be an issue for most coating type oil-based stains as they don't stay wet long enough to affect the chinking joint. However, most coating type oil-based stains utilize a colored topcoat. This means that when you need to do a maintenance coat several years down the road, the stain maker intends for you to just clean the wall and apply a clear topcoat over your existing stain base. This presents a problem as you will need to tape all of the chink joints to keep the stain from altering the color of your chinking. Some prominent stains in this category are the Sikkens Proluxe brand and Sashco's Transformation Log & Timber stain. By contrast, most water-based log stains utilize a clear topcoat. With this type you don't have to worry about taping the edges of your chinking joints to keep the stain away. Additionally, you can simply coat directly over the chinking without fear that it will alter its color. Lastly, we recommend against using deep penetrating oil stains in conjunction with acrylic latex chinking. Deep penetrating oil-based stains are formulated to stay wet at the log surface for an extended period of time to allow the stain to penetrate deep into the wood fibers. Consequently, this type does have a tendency to release acrylic latex chinking joints. Some prominent stains in this category are Outlast Q8 Log Oil and Woodguard Stain.

  • Can Perma-Chink be stained?

    Yes, both water-based and oil-based stains are likely to adhere to Perma Chink Chinking.

  • I'm going to stain my house with Perma Chink Ultra-2 and need to know if I should caulk the house before staining. What is the correct procedure?

    Yes, you should caulk before using Ultra-2 or Ultra-7 stain. For the least visible sealant lines, choose a sealant color that's a shade lighter than the stain you plan to use because it's easier to cover a lighter color sealant with a darker color stain than it is to hide a dark colored sealant with a light colored stain. If you want visible sealant lines, you may apply Energy Seal after you stain. If you do this, it is best to apply Lifeline Advance topcoat after the Energy Seal. This results in a more even appearance. Application to surfaces with freshly applied oil-based stain should be avoided.

  • I have an older house that was chinked with mortar many years ago. The problem I'm having is the mortar is cracking and falling out in places. Can I use Perma Chink to go over the mortar to seal these cracks?

    Unfortunately no, since the existing mortar is cracking and falling out.  It is advised that you remove all of the old mortar before applying Perma Chink, since you need a sound foundation for this compound. Weak and crumbling mortar will eventually cause your repair to fail.

  • I live in Arizona and I applied my chinking yesterday on one wall. I have noticed some small blisters on the south side of my house. Can you tell me what might be happening?

    Perma Chink is sensitive to direct sunlight which can accelerate the "skinning over" of the sealant. This can cause the water contained in the Perma Chink to become trapped which can cause out-gassing, giving this "blistered" look. Always apply Perma Chink on the shady side of the house or very early before the sun becomes too hot. You want the Perma Chink to dry slowly but when it is applied in direct sunlight, it may give you this effect.

DETAILS

Free Ground Shipping
We are offering free shipping for all sizes of this product purchased online and shipping to the Lower 48 United States. Offer does not apply to Alaska, Hawaii, and the US Territories. Free Shipping applies to this item only and not the entire order.

Perma-Chink Chinking is a flexible, textured chinking that seals the open gaps between logs to eliminate heat loss and air infiltration. Even though it looks and feels like traditional mortar, it's not. Perma-Chink Chinking is a pure acrylic that adheres to logs and stretches to maintain a tight seal by following log movement.

Application can be done by the homeowner or a professional contractor.

Features & Benefits:
• Eliminates Air and Water Infiltration.
• Remains Flexible to Allow for Log Movement.
• For Exterior and Interior.
• Suitable for all Climates.

Coverage Rate Chart:

Coverage Rates Chart

• Coverage Chart refers to linear feet per 5 gallon pail of Perma-Chink.
• Perma-Chink should be applied 3/8" thick.
• 1 Pail = approximately (55) 11 oz. tubes.
• 1 Pail = approximately (20) 30 oz. tubes.

Color Chart:

Perma-Chink Color Chart

Where to Use Perma-Chink:
• Interior and Exterior.
• On chink-style log homes.
• To replace old, crumbling mortar on older and historic log homes.
• To create a chinked look on a wood sided surface.

Application Methods:
• Chink Pump.
• Bulk-loading gun and follow plate.
• Ratchet caulking gun.
• Application bag.

How to Measure My Chinking Project:
• There are two dimensions that you need to know in order to determine how much product you will need: the width and the cumulative length (linear feet) of the gaps or joints that you want to seal.
• Figuring the Width: If it is a chink joint on a squared log it is the average distance between upper and lower log surfaces. If it is round log chink joint you first have to insert a length of proper size Grip Strip and then measure the distance between the top and bottom logs about 3/8 of an inch in front of the surface of the Grip Strip
• Figuring the Cumulative Length (Linear Feet): It is best if you break it down to one wall at a time then add all of the walls together it becomes much simpler. Start by measuring the length of the wall with a tape measure. Then count the number of joints you need to seal. Usually it is the number of log courses minus one. When you multiply these two numbers together you have the linear feet of sealant required for that wall.
• Keep in mind that the depth is an average depth across the joint. We tend to think of the depth in the middle of the joint where it is actually the thinnest. If your estimations are generally short, check to see that you use average joint depth.

Colors:
• Beige 216, Black 227, Brown 223, Cedar 230, Light Gray 212, Medium Gray 224, Sandstone 215, Stone 211, Tan 219, White 207

MORE INFORMATION

Recommended Chinking Application Tools:
• Application bags, caulking gun or bulk loading caulking gun.
• Follow plate for bulk loading gun. Click for the Tapered Follow Plate.
• Tool Pouch.
• Clean, lint-free rags for wiping down log surfaces, for spills, runs and cleanup.
• Trowels and spatulas (close to the width of the finished seam is best).
• Masking tape if desired.
• Sharp knives suitable for trimming backer-rod.
• Cardboard box or table for holding backer-rod while adhesive is applied.
• Spray adhesive (such as 3M™ 77) for installing backer-rod.
• Spray/mist bottle (use water with a few drops of soap as a release agent).
• Isopropyl alcohol – combine with 50% water for ‘release agent’ mixture.
• Masonry margin trowels of appropriate sizes (1/2” to 2” most commonly used).
• Sheets of heavy plastic or canvas to protect job site from spills and inclement weather.
Closed Backer-Rod in appropriate sizes, or other backing materials such as Grip Strip.
• Adequate quantity of chinking/caulking.

Preparation Instructions:
• Before starting, inspect the installation of backing materials. Where pieces of backer butt up to one another, make sure that there are no gaps or ledges between pieces.
• If you find gaps, fill them with backing material or cover the span with tape.
• Make sure that the wood surfaces along the seam are clean and free of oils or waxes to insure proper adhesion of the cured chinking.

Application Information:
• Freshly applied sealants should be protected from direct rainfall for a minimum of 24 hours. Either watch the weather or drape a newly sealed wall with plastic film. Be sure to allow some airspace between the wall and the plastic to facilitate drying.
• Avoid applying sealants in direct sunlight or when the temperature is less than 40° F. In cold weather it’s important that the logs be free of frost and dew in order to ensure that the sealant adheres tightly to the wood. Like stain, the best surface temperature range for easiest application and best results is between 50° F and 80° F.
• Apply only as much chinking as you are able to tool smooth in about 15 minutes (less in warm dry weather that causes the chinking to skin over rapidly).
• Start by holding the applicator tip against the back surface of the joint and apply a bead of chinking. If multiple beads will be required to span the entire gap, apply them close together to avoid trapped air during tooling.
• Apply enough chinking to maintain a wet thickness of approximately 3/8 inch.
• The first step in finishing is to wet the trowel only (not the chinking), then spread it out evenly to 3/8 inch thickness, making sure the wet chinking is in good contact with the wood surfaces at both edges of the seam. Good contact is critical for proper adhesion after curing.
NOTE: Be careful to maintain proper thickness in all corners.
• After smoothing to the proper thickness, lightly wet the surface of the chinking and tool to finished smoothness.
• Avoid applying enough water to cause it to run onto the wood surface. Wipe any runs immediately.
• Tip: If you used masking tape at the edges of the chinking, remove it now and smooth out edges with your tool.
• If your preference is for the finished chinking to have a different texture than smooth, you should experiment before application.

When to Apply Perma-Chink:
• Weather: Protect freshly applied Perma-Chink Chinking from rain for at least 24 hours to allow a water resistant skin to form.
• Apply Perma-Chink log home sealant after staining for the best finished appearance and least total labor to avoid getting stain on the new chinking.
• Best: After application of Lifeline, but before Lifeline Advance clear topcoat (Lifeline Advance should be applied over Perma-Chink log home sealant, making it easier to clean.)
• Second Best: After application of Lifeline stain and Lifeline Advance topcoat.
• Worst: Over a fresh application of oil based stain. Oil based stains must be allowed to dry for 2 months. Then, clean the chinking surface with alcohol to remove dust and oily residues.

Can Perma-Chink be Applied In Hot Temperatures?
• Applications of all Perma-Chink exterior finish removers, cleaners, stains, topcoats and sealants can be a bit of a challenge in extremely hot weather, i.e. over 90° F.
• Sealants such as Perma-Chink are more sensitive to direct sunlight even in cooler temperatures than they are to heat in general. Direct sunlight accelerates the “skinning over” of the sealant trapping the water contained within the product. When this water converts to water vapor and tries to escape from the product it can create bubbles or blisters on the surface of the sealant.
• High ambient temperatures do influence the viscosity of sealants, they become more fluid, but for the most part they can still be successfully applied even when the temperature exceeds 90° F as long as the freshly applied product is protected from direct sunlight.

Why is Backing Material Needed?
• The use of backing material behind a sealant such as Perma-Chink serves two purposes; one, to assure the proper thickness of the sealant so that it can stretch and contract without breaking; and two, to provide a surface that the sealant will not bond to so that it can stretch without tearing away from the wood.
• The dynamics of sealing an exterior joint or crack in wood is the same regardless of the width of the gap or the product being used. If the wood is unseasoned at the time a sealant is applied, the wood will shrink with time and in order to compensate for the shrinkage the sealant must be applied in a manner that will allow it to stretch.
• When a sealant is applied too thick, once it cures it won't be able to stretch enough to compensate for the wood's shrinkage and may rip apart. When applied too thin it becomes too weak to stretch without breaking
• If applied too thick they cannot stretch without tearing and if too thin they will be weak and will tear when pulled apart. In the case of sealants manufactured by Perma-Chink Systems the magic number is an applied wet thickness of 3/8”. This results in a cured sealant with excellent elongation and maximum strength.
• Backing materials serve little purpose other than providing a suitable sealant thickness and surface for the proper application and performance of the sealant.
• Some important features of a good backing material include:
1. It must be inert and not outgas or react with the sealant.
2. The sealant itself should not bond tightly to it.
3. It should not wrinkle or deform when the sealant is applied over it.
4. It needs to be able to withstand temperatures of at least 190º F without warping or distorting.

What Types of Backing Material Should I Use When Applying Perma-Chink?
Grip Strip. Closed Cell Backer Rod. Polyisocyanurate board (Polyiso or R Max).
• Expanded polystyrene (EPS) beadboard, foil-faced. Chinking applied over the foil covered side.
• Polyurethane foam (Pur Fill, Great Stuff, Styrofoam).
• Water-resistant masking tape or pinstripe tape.
• DO NOT USE: Extruded Polystyrene (causes blisters), Blue Board, Pink Board or other colored board that outgasses to cause blisters. If you are unsure about your backing material, check with Perma-Chink Systems before using it.
• There are a number of products specifically designed for use as backing materials for sealants. For smaller gaps, joints and cracks the most commonly used material is Closed Cell Round Backer Rod. It comes in a range of sizes and is relatively inexpensive.
• Since it is flexible it can be pushed into a crevice without needing to be nailed or stapled. Grip Strip is designed for sealing larger gaps. Similar in composition to backer rod it is shaped like a trapezoid so it can be squeezed in between round logs although it can be used for a variety of situations. Grip Strip provides a flat surface for chinking or sealing.
• For wide chink joints between squared logs it is typically recommend the use of polyisocyanurate board (polyiso or R Max) or expanded polystyrene (EPS) beadboard. However, one side of the beadboard should be covered with a foil to help reflect the heat.
• If plain beadboard is used, there is a risk of the beadboard deforming on sunny areas where wall temperatures can reach over 180 degrees. When using foil covered beadboard the chinking needs to be applied over the foil side.
• In joints that are too narrow to insert even the smallest diameter backer rod, a narrow strip of water-resistant masking tape works quite well. Do not use masking tape that wrinkles because if it gets wet wrinkles may show through the sealant.
• An excellent option is to use pinstripe tape available at most automotive supply stores. The tape is vinyl, so it is waterproof and most sealants will not adhere to it. Pinstripe tape is available in widths down to 1/8”.

Drying & Curing Information:
• Perma-Chink log home sealant develops a skin in a short period of time. Full curing requires it to dry all the way through and may take a number of weeks. Cool temperatures or high humidity extends drying time.
• Protect freshly applied sealants from rain for at least 24 hours to allow a protective skin to form.
• Blisters during curing are common to sealant applications in hot environments. Blisters can be caused by use of improper backing materials or by trapping air inside of the wet chinking during application. Prevent most blisters by making sure to trowel all air out of seams in “multi-bead” applications.
• Avoid application in direct sunlight on south and west walls. If newly applied chinking is exposed to sunlight begins to blister, the effect can be minimized by shading the walls with white tarps for the first 1-2 days. In the first few days, blisters can be closed by puncturing the surface skin of the chinking and carefully pressing the blister surface back against the wet chinking inside.
• Perma Chinks cures completely in 2-8 weeks depending on temperature and humidity.

Clean Up and Storage:
• Clean area and equipment immediately with warm, soapy water before the Perma-Chink dries.
• For removing Perma-Chink that has dried, soften with alcohol and then clean with warm water. Please do not pollute our environment.
• Store Perma-Chink chinking in a clean, dry place and out of direct sunlight.
• Do not allow the material to freeze. Although Perma-Chink is freeze-thaw stable, if the product is accidentally frozen, allow to thaw, mix well and check for suitability of use before applying.

Maintenance Information:
• Periodic cleaning with an appropriate cleaner such as Log Wash will clean off dust and dirt and accentuate the beauty of your home.
• Perma-Chink Systems recommends that log walls be washed down at least twice a year. Small rips and tears may be repaired using a bead of Perma-Chink and a damp short bristled brush to blend it in with the surrounding area. Tears greater than one foot long should be cut out and the chinking replaced.

How To Avoid and Correct Blistering:
• Blisters are a common phenomenon with chinking and caulking products and are caused by a variety of things. Blisters appear as “bubbles” in the chink line and can vary widely in size.
• Do not apply in direct sunlight.
• Protect fresh chinking from direct sunlight for 1-2 days after application with white plastic sheeting or traps tacked over it.
• If a blister begins to develop: Pop the blister and gently push the material back into place. 3 to 5 days later, apply a skim coat of Perma Chink and tool to blend in.

How to Repair Torn Perma-Chink:
• First, use a razor knife to slit the chink or caulk line a bit further to release pressure on the bead. Then, clean the surface by wiping it down.
• Gun new chinking or caulking over the torn area, then smooth (tool) the new product, feathering it out onto the existing bead.
• If no backer rod was applied, you may need to cut out the torn area, install backer rod, and then follow the remaining steps as noted above.

Perma-Chink How-To Guides For Perma-Chink Chinking:
Drying and Curing Times
Protecting Uncured Chinking
Why Use Backing Materials?
Loading Bulk Guns
Repairing Perma-Chink
Chink Paint Vs. Chinking

REVIEWS
PRODUCT QUESTIONS

Product Questions

  • I'm planning to use chinking on my logs. What kind of stain should I use with it?

    These days, most chinking projects utilize water-based acrylic latex chinking products and the chinking is intended to contrast in color from the wall stain. If this is your case, we recommend using a water-based stain with a clear topcoat for your log walls. This is more for practical reasons than compatibility concerns. Even though most chinking products are water-based, compatibility will not be an issue for most coating type oil-based stains as they don't stay wet long enough to affect the chinking joint. However, most coating type oil-based stains utilize a colored topcoat. This means that when you need to do a maintenance coat several years down the road, the stain maker intends for you to just clean the wall and apply a clear topcoat over your existing stain base. This presents a problem as you will need to tape all of the chink joints to keep the stain from altering the color of your chinking. Some prominent stains in this category are the Sikkens Proluxe brand and Sashco's Transformation Log & Timber stain. By contrast, most water-based log stains utilize a clear topcoat. With this type you don't have to worry about taping the edges of your chinking joints to keep the stain away. Additionally, you can simply coat directly over the chinking without fear that it will alter its color. Lastly, we recommend against using deep penetrating oil stains in conjunction with acrylic latex chinking. Deep penetrating oil-based stains are formulated to stay wet at the log surface for an extended period of time to allow the stain to penetrate deep into the wood fibers. Consequently, this type does have a tendency to release acrylic latex chinking joints. Some prominent stains in this category are Outlast Q8 Log Oil and Woodguard Stain.

  • Can Perma-Chink be stained?

    Yes, both water-based and oil-based stains are likely to adhere to Perma Chink Chinking.

  • I'm going to stain my house with Perma Chink Ultra-2 and need to know if I should caulk the house before staining. What is the correct procedure?

    Yes, you should caulk before using Ultra-2 or Ultra-7 stain. For the least visible sealant lines, choose a sealant color that's a shade lighter than the stain you plan to use because it's easier to cover a lighter color sealant with a darker color stain than it is to hide a dark colored sealant with a light colored stain. If you want visible sealant lines, you may apply Energy Seal after you stain. If you do this, it is best to apply Lifeline Advance topcoat after the Energy Seal. This results in a more even appearance. Application to surfaces with freshly applied oil-based stain should be avoided.

  • I have an older house that was chinked with mortar many years ago. The problem I'm having is the mortar is cracking and falling out in places. Can I use Perma Chink to go over the mortar to seal these cracks?

    Unfortunately no, since the existing mortar is cracking and falling out.  It is advised that you remove all of the old mortar before applying Perma Chink, since you need a sound foundation for this compound. Weak and crumbling mortar will eventually cause your repair to fail.

  • I live in Arizona and I applied my chinking yesterday on one wall. I have noticed some small blisters on the south side of my house. Can you tell me what might be happening?

    Perma Chink is sensitive to direct sunlight which can accelerate the "skinning over" of the sealant. This can cause the water contained in the Perma Chink to become trapped which can cause out-gassing, giving this "blistered" look. Always apply Perma Chink on the shady side of the house or very early before the sun becomes too hot. You want the Perma Chink to dry slowly but when it is applied in direct sunlight, it may give you this effect.